


Dear Learnmoretrick viewers!!Today we are going to
discuss how to add online chat widget on your blog. As you know I always
write a post about how to customize your blog for giving a attractive and
unique look for users, this online chat widget is also an important part for
your blog to direct interact with your visitors. If you want to add online chat
widget on your blog you should done some few steps and don’t worry, I will
teach you briefly.
What is online Chat widget?
Online chat widget
is a tool which helps to user directly contact you and chit chat with you. It
makes strong relationship and trust between user and owner. Which may help your
bog high rank. It is a convenient way to direct meet user and hear their
problem and solve in a real time. Which provide an easy way to integrate your
blogger page with live chat Solution. That are most user-friendly chat
solutions.
Free online chat widgets for blogger
There are many chatting widgets available in internet but
most of them should be paid to get their full features, despite this some
online chat widget are still available which serve free with out any cost for
user and these are also effective and easy to us. Such widgets are may be with
box style or floating style. Among them today I am going to teach you few such
widgets which are listed below.
1.Online chat widget by Chat roll
2. online chat widget by Twak.to.
3. floating chat widgets by what’s help
4. online chat widget by my chat live.
Online chat widget by Chat roll
This Chat widget is provided by chat roll. Which is box style and
add on your blog side bar using simple html scripts on your layout.You can live chat using this widget with your visitors in a real time. To install
this widget on your blog follow these steps:

Step-1: Open Chatroll website and Click on Signup for Free button.
Step-2: Create your new account or login with your facebook account.
Step-3: Once you logged in your account then Click on Create a new live event option.
Step-4: Next page will be your live widget settings page. Enter name for your widget and click Continue option.
Step-5: Next screen is about platform selection screen. Select Blogger option.
Step-6: Code for your live chat widget will appear. Copy this code and clickContinue option.
Step-7: Now Click on Go to Settings Now option.
Step-8: Now a final page will appear which contains your live chat widget settings like color scheme of your widget. Configure your widget here and save the settings by clicking on Save settings option.
Step-9: Login to your blogger dashboard and select your blog.
Step-10: Select Layout option and Click on Add a Gadget option.
Step-11: Select HTML/JavaScript widget.
Step-12: In the HTML/JavaScript widget paste the code of the live chat widget which is obtained in the Step 6 in Part 1 of the tutorial.
Step-13: Save the widget and enjoy.
Step-10: Select Layout option and Click on Add a Gadget option.
Step-11: Select HTML/JavaScript widget.
Step-12: In the HTML/JavaScript widget paste the code of the live chat widget which is obtained in the Step 6 in Part 1 of the tutorial.
Step-13: Save the widget and enjoy.
Chat Widget by Twak.to
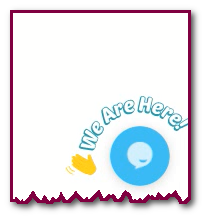 This chat widget is provided by twak. Which is floating type
widget and visible on right side of your blog on the bottom .While you are
online its shows we are online message and you can direct chat with user if you
are offline it shows offline message icon but still user can leave message and
you can reply later while you are online.
This chat widget is provided by twak. Which is floating type
widget and visible on right side of your blog on the bottom .While you are
online its shows we are online message and you can direct chat with user if you
are offline it shows offline message icon but still user can leave message and
you can reply later while you are online.You can see live visitors with this widget. I already said that it is a floating icon and add on your blog using simple html scripts on your blog template. To install this widget on your blog, follow these steps:
Step-1: Click Twak. to open official page
Step-2: Click Sing up free with your valid information on twak
dashboard.
Step-3: Create a completely free account then click signup for free
Step-3: Create a completely free account then click signup for free

Step-3: you are driven to twak.to Dash board in this
section you should do few easy setups.
- Select your language and click next property.
- Enter your Website detail; Your website
name and valid URL then click next property
- Add team member; If u need more team
member to use this tool on your website then add them by their email address
and give their role to your site like admin or agent otherwise leave as it is.

- Click on Install widget or SKIP
- Then you can see HTML Codes, Copy HTML Code

Step-4: Paste HTML codes just above </body>
tag on your theme template.
·
Go to your blogger dashboard
·
Click theme
·
Click edit Html
·
Put a cursor inside existing codes the press CTRL+F
for search box.
·
type </body> and search it
on your template.
·
Paste copied HTML codes just above
</body> tag
·
Then save template and view your page
after refresh.
Step-5: open www.dashboard.twak.to
and you can Live chat with your visitors.

Online Chat widget by What's Help
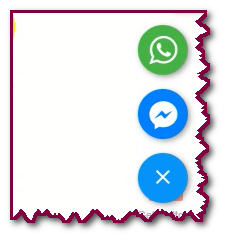 This Chat widget is provided by what’s help and most recommended
widget because using this tools you can chat with your user through your any
two platform freely (like WhatsApp, Facebook messenger).You can use only two
chatting platform freely to get more option you should pay amount.
This Chat widget is provided by what’s help and most recommended
widget because using this tools you can chat with your user through your any
two platform freely (like WhatsApp, Facebook messenger).You can use only two
chatting platform freely to get more option you should pay amount.
This is floating type widget and visible on either right
side or left side of your blog on the bottom (you can customize it wherever you
want to display). While any user wants to message you they can choose options.
To add this amazing chatting widget, you should follow few
steps:
Step-1: Click here for Chat buttom page
Step-2: Click on Get your Button from bottom of the
page

Step-3: Choose any two-messaging app for your blog
(To choose more than two app you must paid)
- To add messenger and what’s app icon add them by clicking (+) icon.
- Paste your face-book page id on messenger section
- And type your own phone number on what’s app section
Step-4: Customize
your Button with live preview
- You can change your Button color from here
- You can change this widget position for your blogger (Left or Right) By default it will be right.
- Yow can display any welcome message /title on call to action
Step-5: Scroll down this page and you can see add
the code to your website, in this section add your email-id to get
code.
Step-6: After click get code, you can see your HTML codes,
copy this code and paste above </body> tag on your theme
template.
·
Go to your blogger dashboard
·
Click theme
·
Click edit Html
·
Put a cursor inside existing codes the press CTRL+F
for search box.
·
type </body> and search it
on your template.
·
Paste copied HTML codes just above
</body> tag
·
Then save template and view your page
after refresh
Onlie Chat widget by My Chat Live
This is also floating type chatting widget display on
bottom of your blog post, while users want to chat with you using this widget
it will popup and can chit chat with you. To direct chat with your users you
should login its dashboard and then chatting with your audience.

To add this amazing chatting widget, you should follow few
steps:
Step-1: Open your internet browser search Blogger chat
widget on Google.
Or, you can direct click Mylivechat
Step-2: Click register tab and put your information
and signup.
Step-3: Now you are driven its dashboard, where
you can see HTML Codes
Step-4: Copy and paste this code on your theme
template HTML just above </body>tag
·
Go to your blogger dashboard
·
Click theme
·
Click edit Html
·
Put a cursor inside existing codes the press CTRL+F
for search box.
·
type </body> and search it
on your template.
·
Paste copied HTML codes just above
</body> tag
·
Then save template and view your page
after refresh


0 Comments
Dear Viewers if you have any comment regards this post let me know.